Steve’s Guide to Scrollytelling
(Almost) all you need to know about how to create a scrollytelling document for a concept map! To get started, you’ll first need to install a few things, and in a particular order (conveniently, as they appear below). You’ll download R, RStudio, and Quarto from the stated websites; all of these are free and open-source. As a last step, you have to tell RStudio how to use closeread, the extension that will let you create a Scrollytelling document. We will get to that later, though, after we’ve opened RStudio and started a project.
You’ll only ever have to do these ‘download things’ steps once on any given machine - once it’s downloaded, it’s there!
R
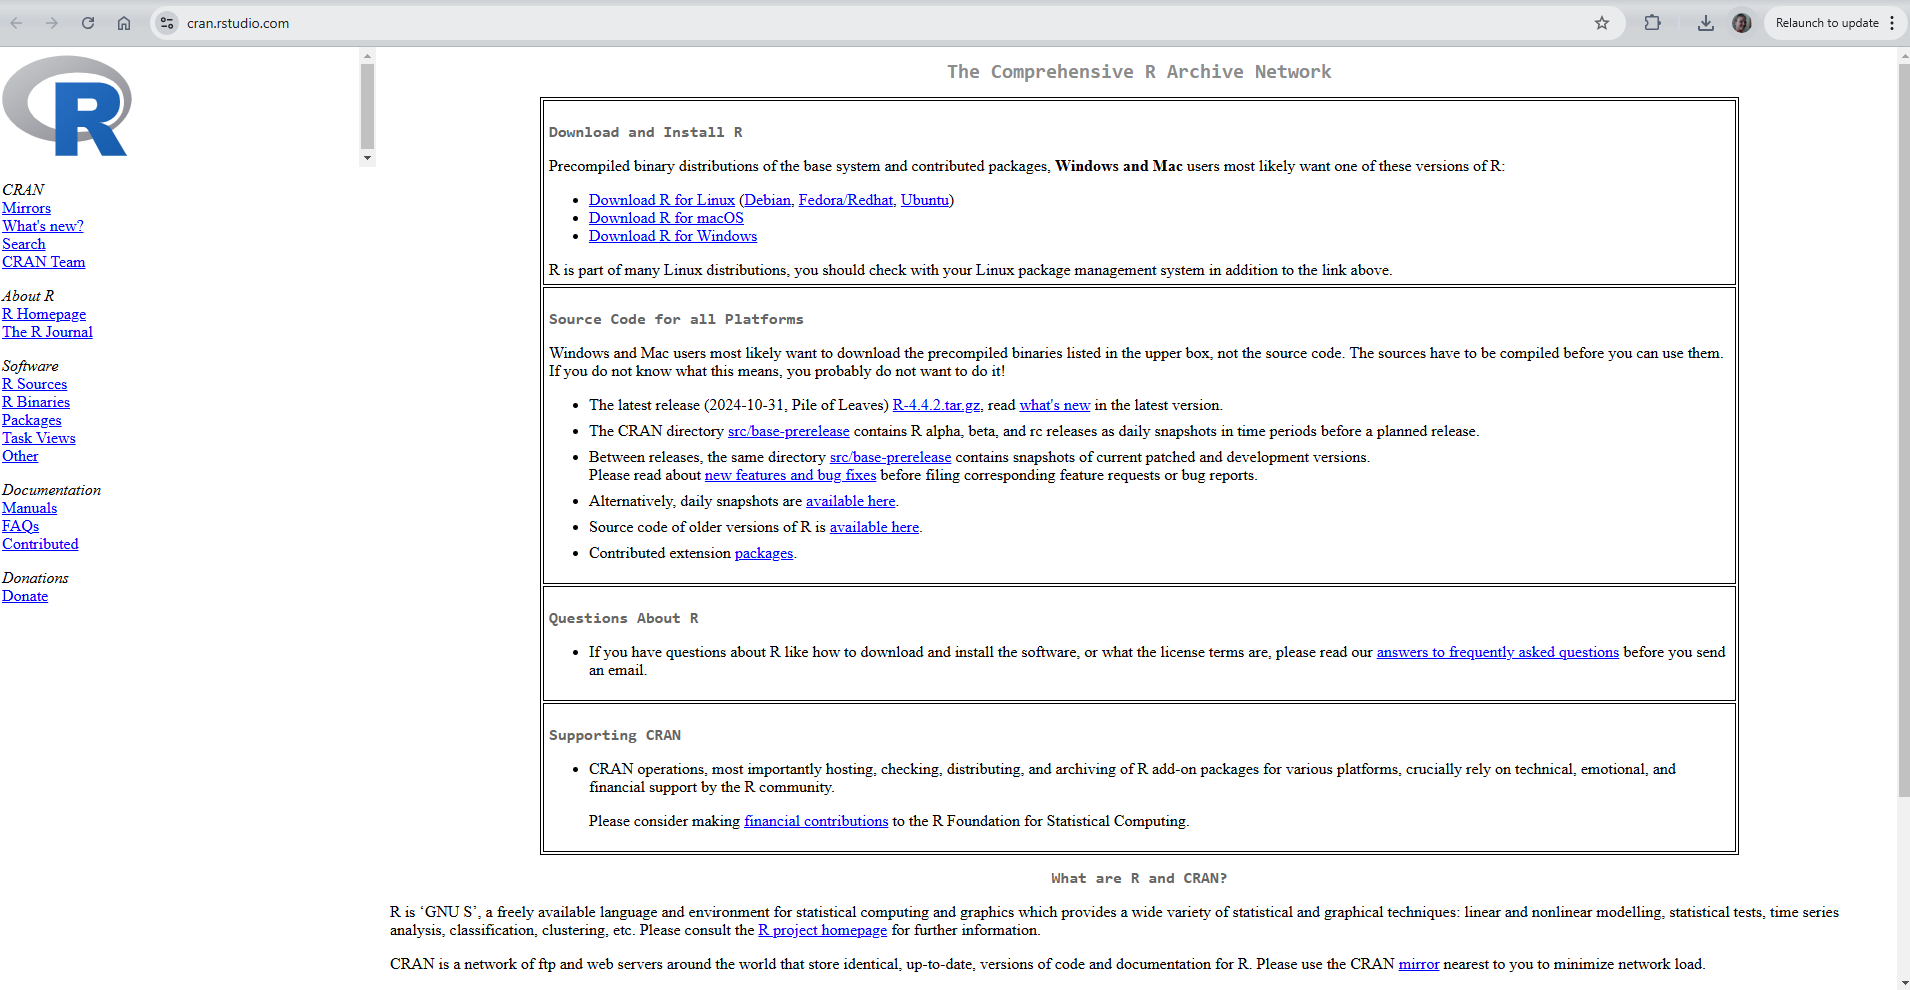
First, we will install R by visiting https://cran.rstudio.com/. Even though we won’t use R directly, we still need it before we can install other user interfaces!
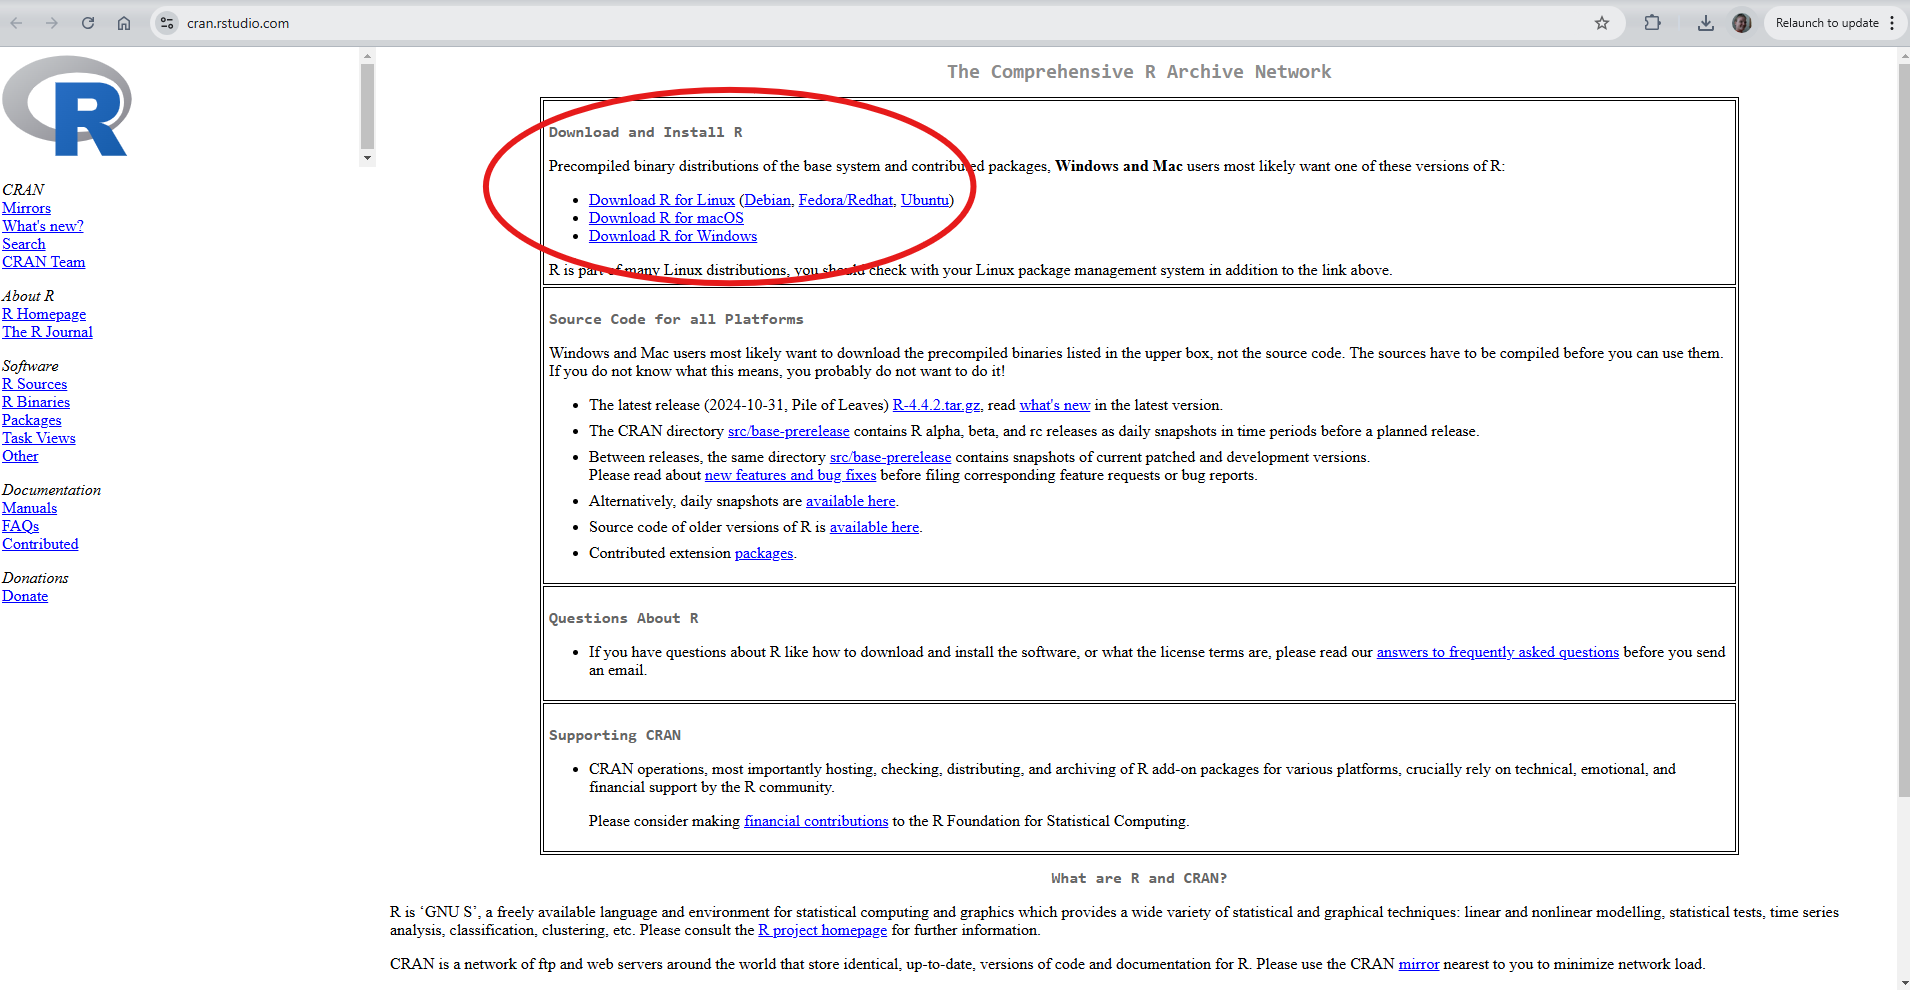
At the top of this page is a series of download links: Mac, Windows, and Linux options. You’ll pick the one that best describes your computer, and follow the directions at the appropriate link.
Now that R is installed, time to install RStudio.
RStudio
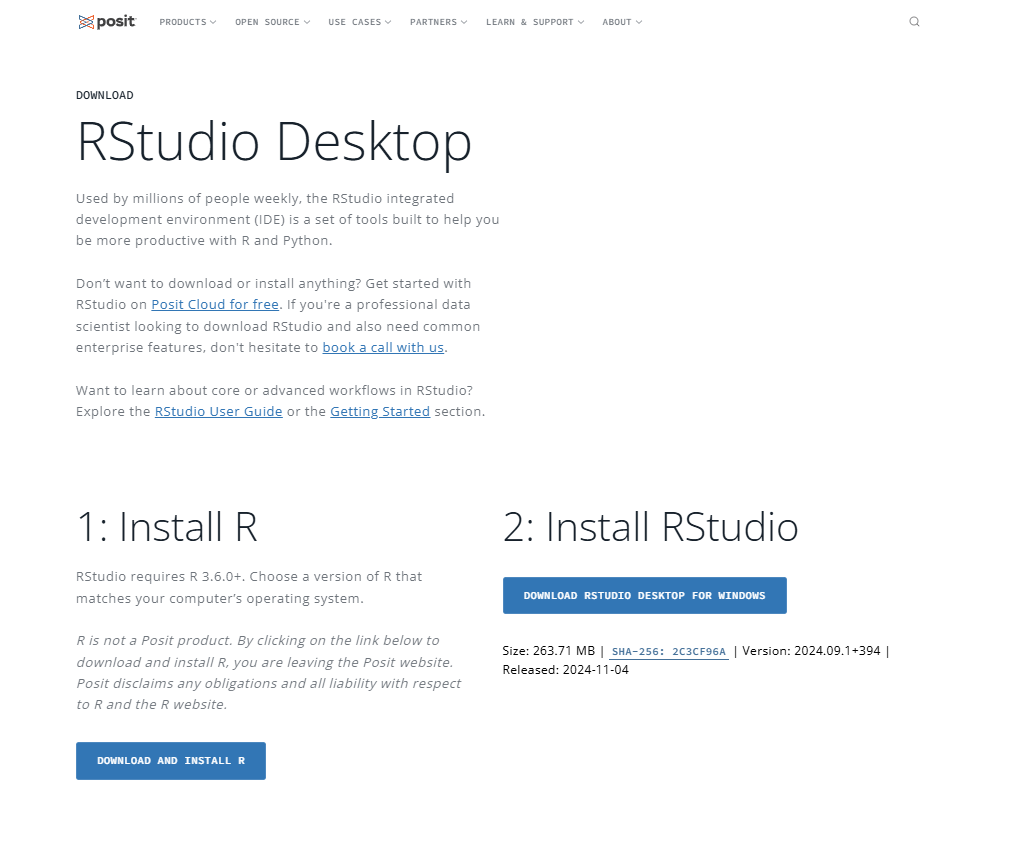
To install RStudio, a user-friendly interface for R, you will go to this link: https://posit.co/download/rstudio-desktop/. You’ll notice that you’ll be prompted to first install R (which we’ve already done!) before installing RStudio. RStudio will be used to create the project to house the Scrollytelling document, using Quarto (to be installed next).
If you have a windows machine, you can go to the big blue button (“DOWNLOAD RSTUDIO DESKTOP FOR WINDOWS”)
If you do not have a windows machine, if you scroll down a bit, you’ll see a list of options for different operating systems. Just pick the one that best fits your situation, and follow the directions for installing on your machine.
The RStudio icon is what you will click to start a new project, so put it somewhere that you can find it again. We will not be using the R icon, so if you don’t remember where that is, it’s okay.

Quarto
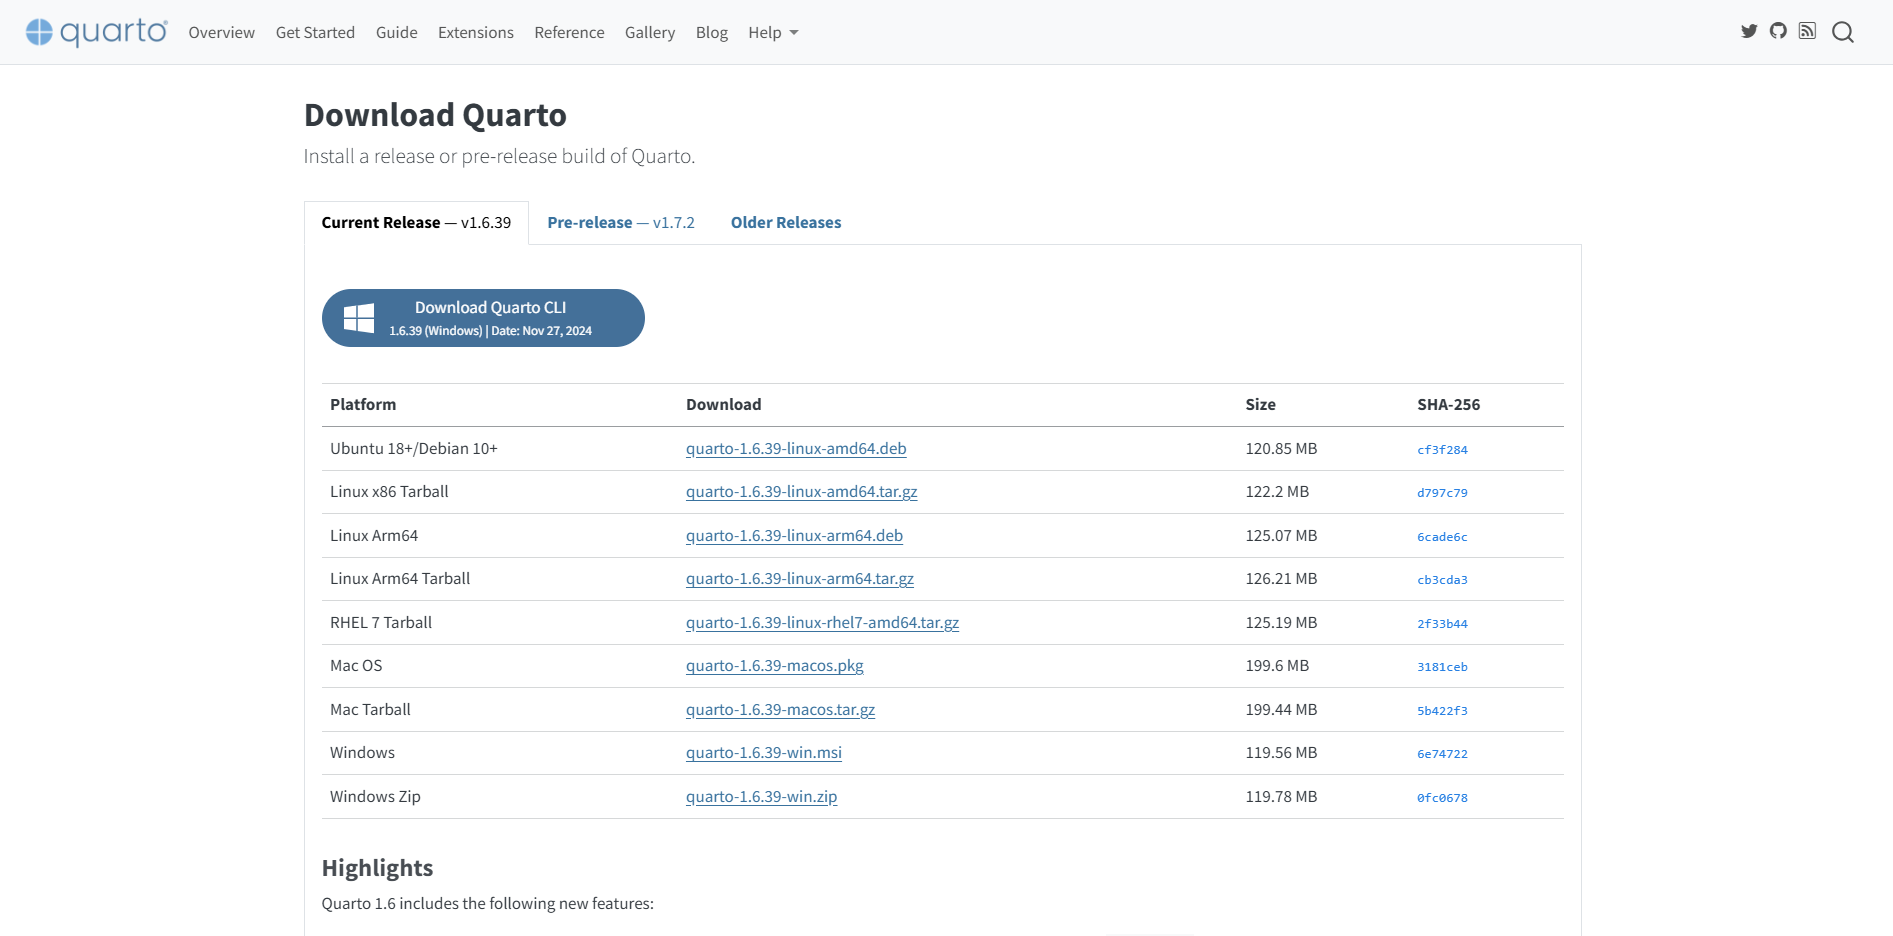
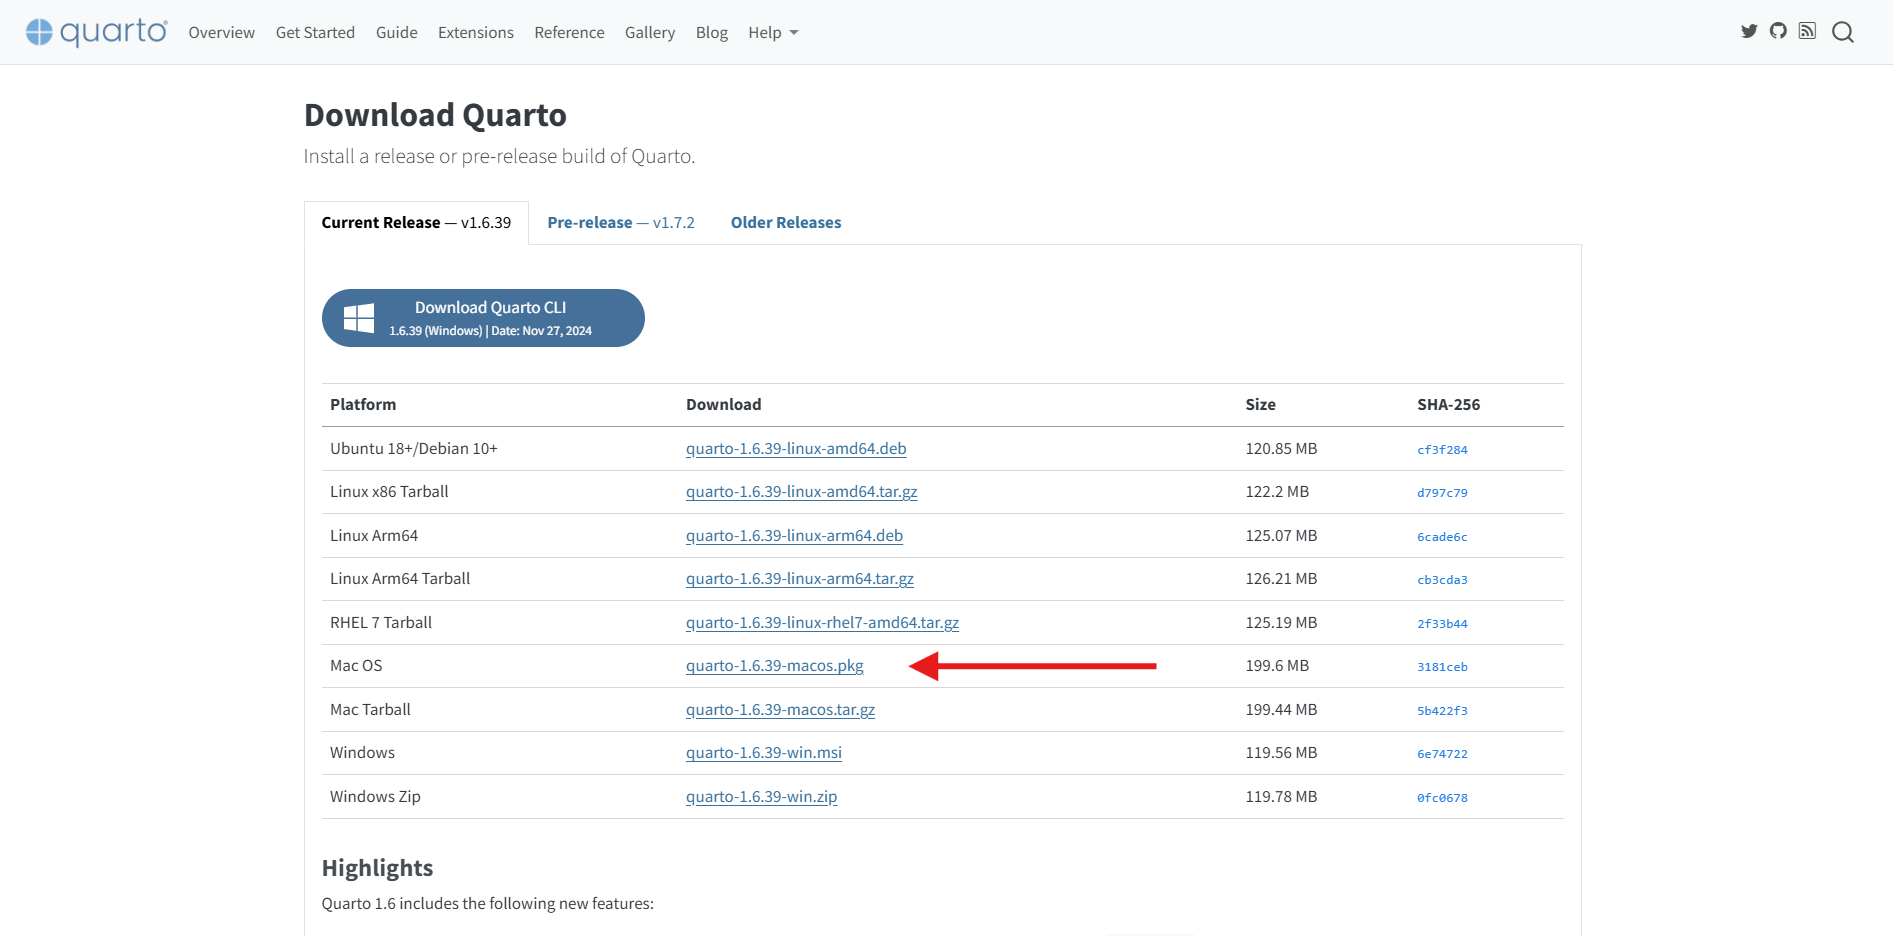
Quarto is a publishing system that allows for integration of a number of different programming and visualization languages (e.g. R, Python, GraphViz, etc.) as well as narrative. As an added flexibility, Quarto documents can be rendered in a wide variety of formats, from websites and books to PDF and HTML. We will be making use of the html rendering capability for our Scrollytelling document. To download Quarto, you will visit https://quarto.org/docs/download/.
As with RStudio, if you have a Windows machine, there’s a big blue button for you to install Quarto on your machine.
If you don’t have a Windows machine, you’ll again select the appropriate operating system from the list provided.
The Mac option is hidden a bit further down this list than it was for RStudio. It is there, though!
Opening RStudio
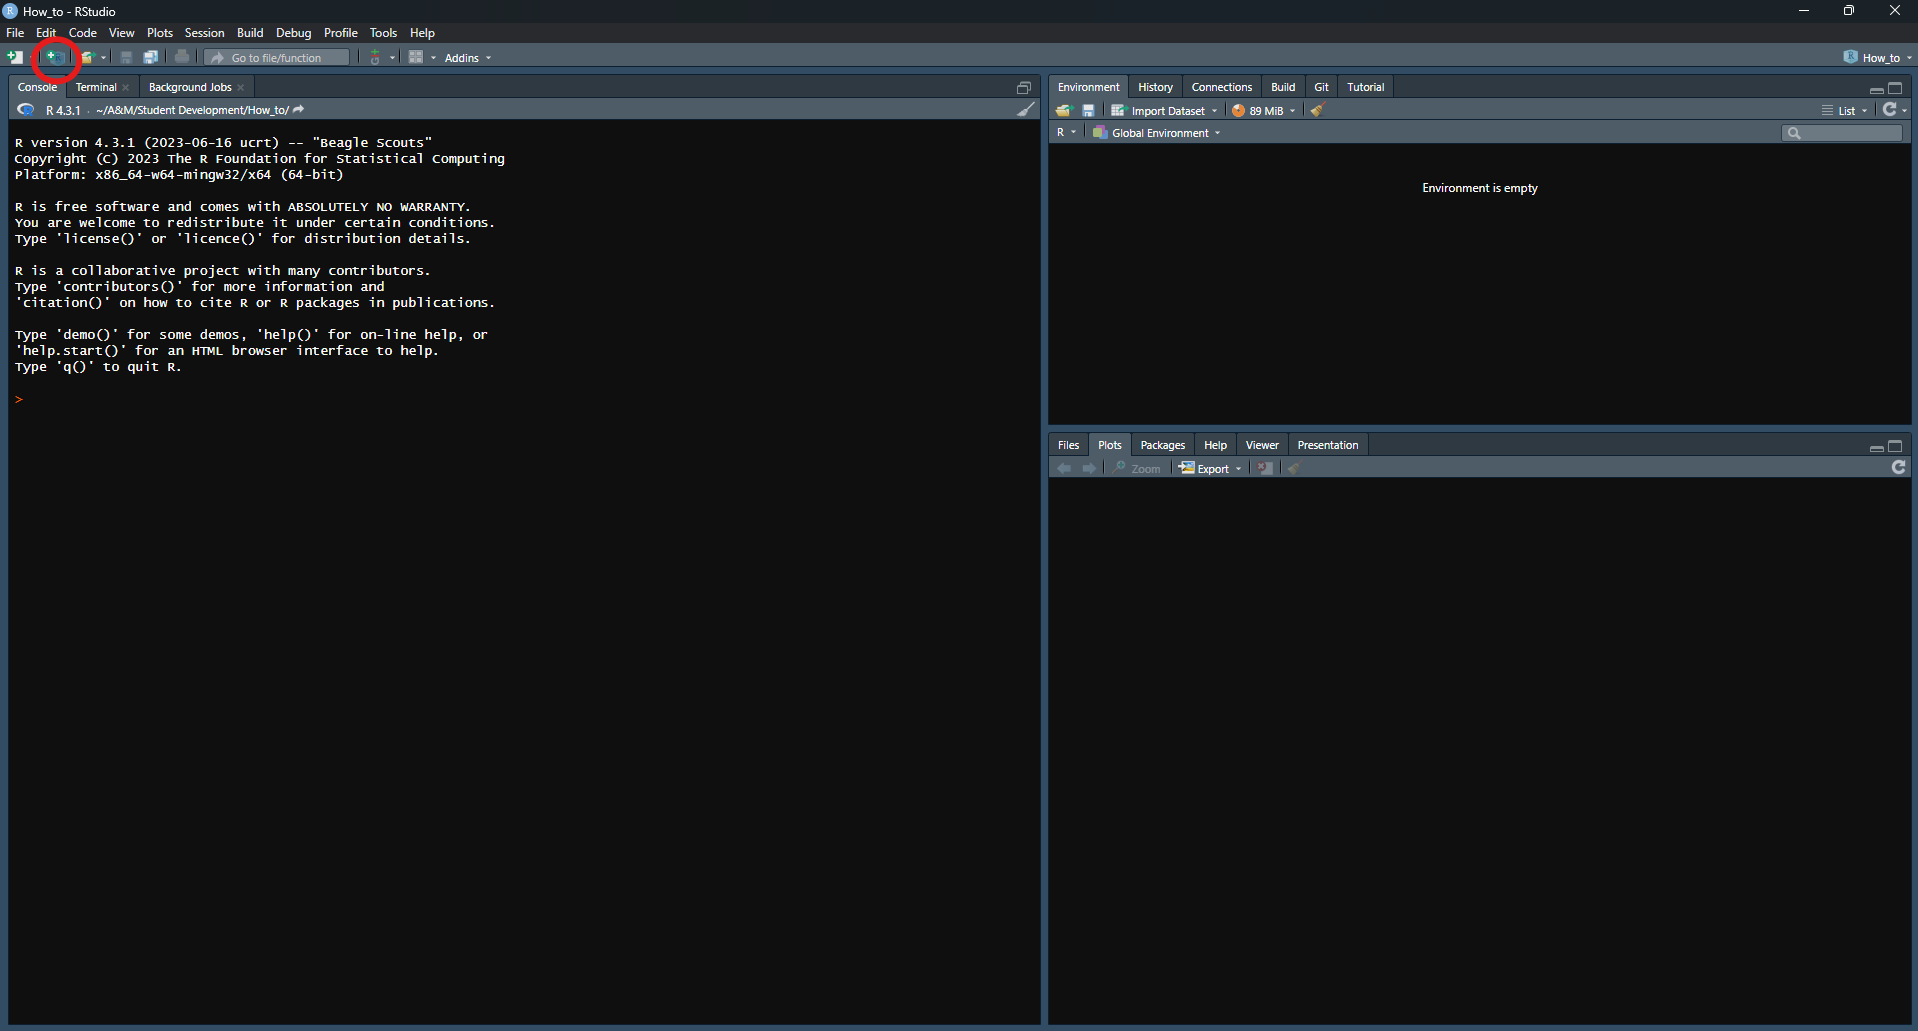
To start our concept map, we will open up RStudio. When we first open it up, we only see three of the four possible windows.
We need to open up a new Quarto project, which will let us keep all our files in one folder. If we were to want to reference any pictures or files, having them all in the same project will make it easier. It also becomes easier to share a project - you can just share the entire folder and know that it contains everything needed to reproduce your concept map.
Clicking the circled icon will open the menu to start a new project.
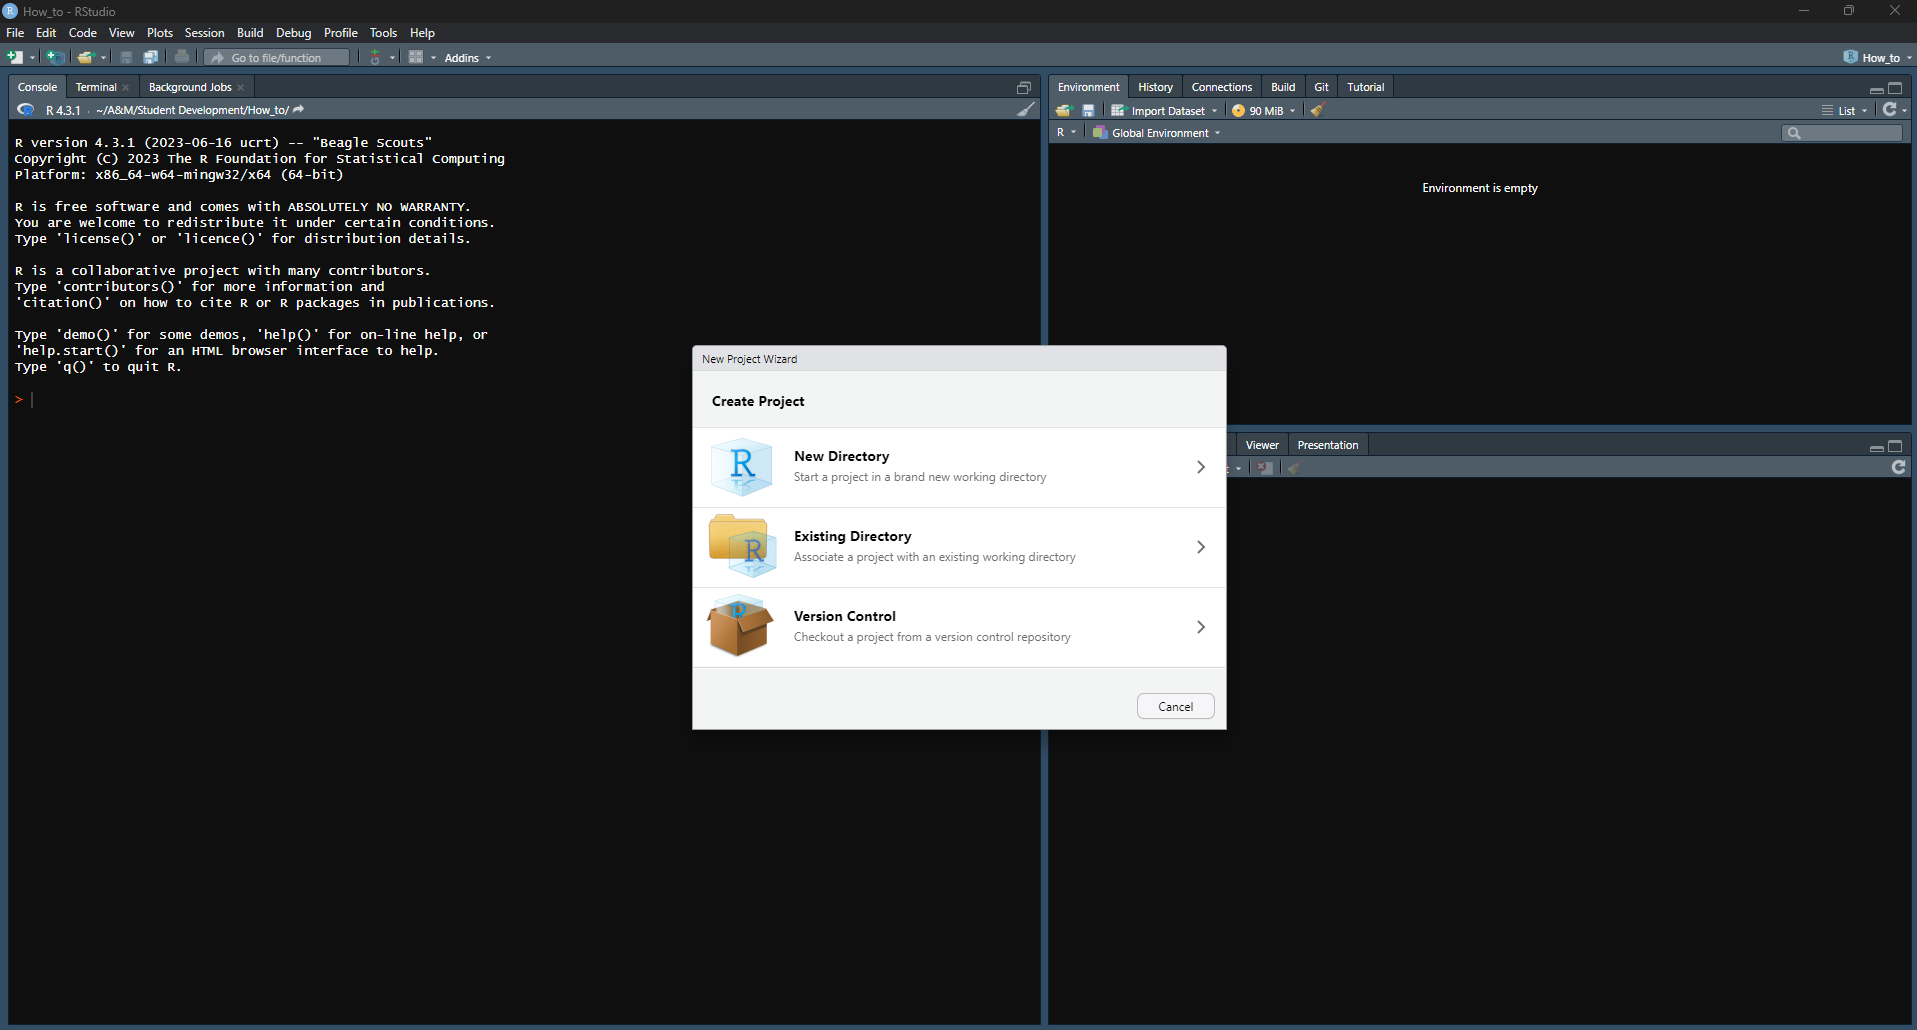
Your first choice will be where you’d like to put this new folder.
Choosing a new directory will allow you to choose where in your file structure you want a new folder created. We will choose this option for now.
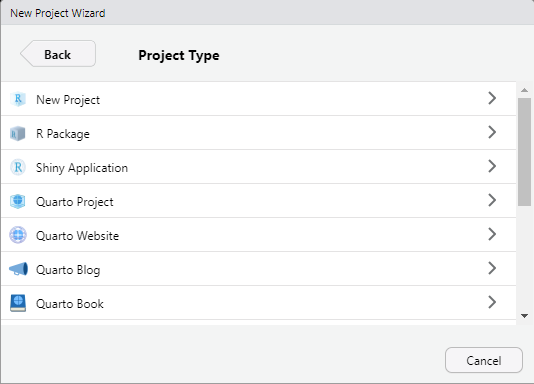
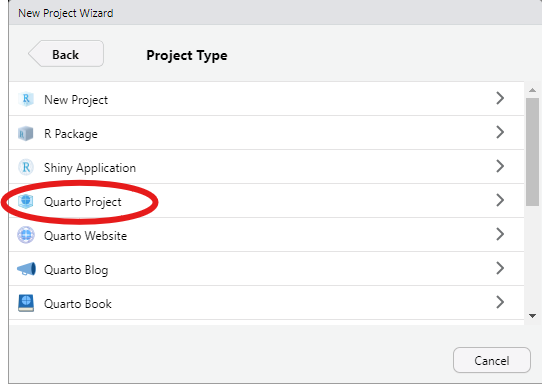
Our next step is to select what type of project we want to create.
We will choose ‘Quarto Project’ for our concept map project.
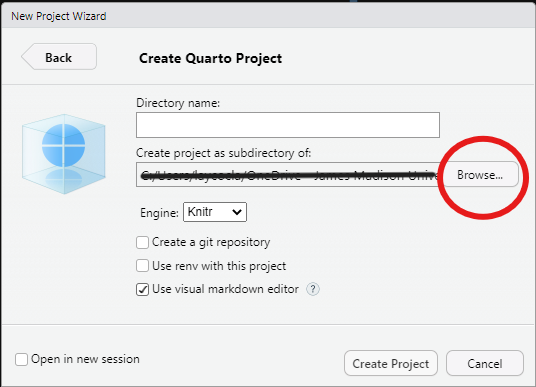
Once we have selected our project type, we then get to say where we want this folder to live on our computer
Clicking ‘Browse’ will open your file directory and allow you to select where to put the folder.
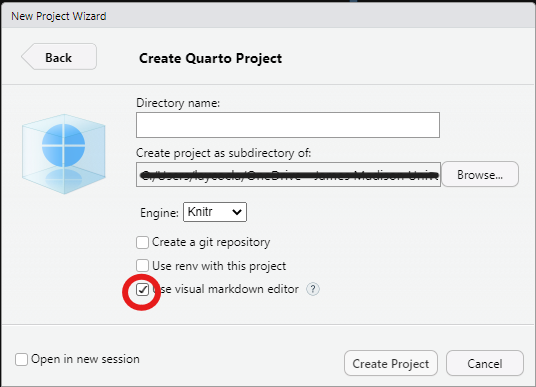
I prefer to uncheck the box for ‘Visual Editor’, but this is entirely up to personal preference.
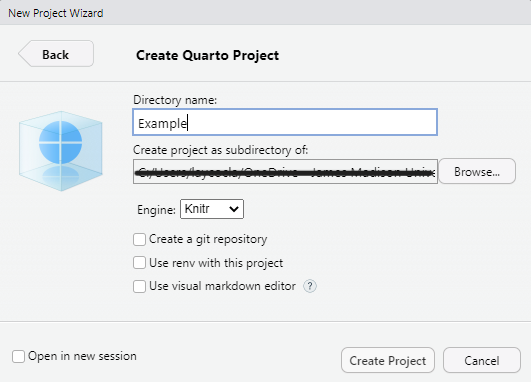
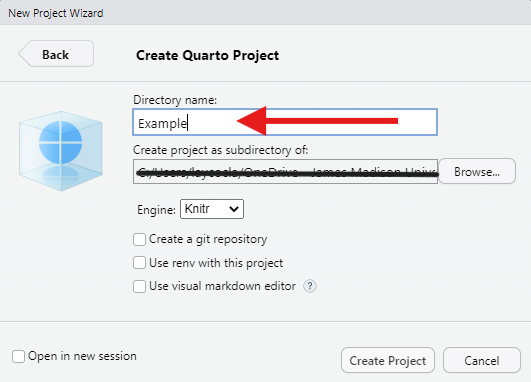
The last step is to name the folder.
I am choosing to name this one ‘Example’.
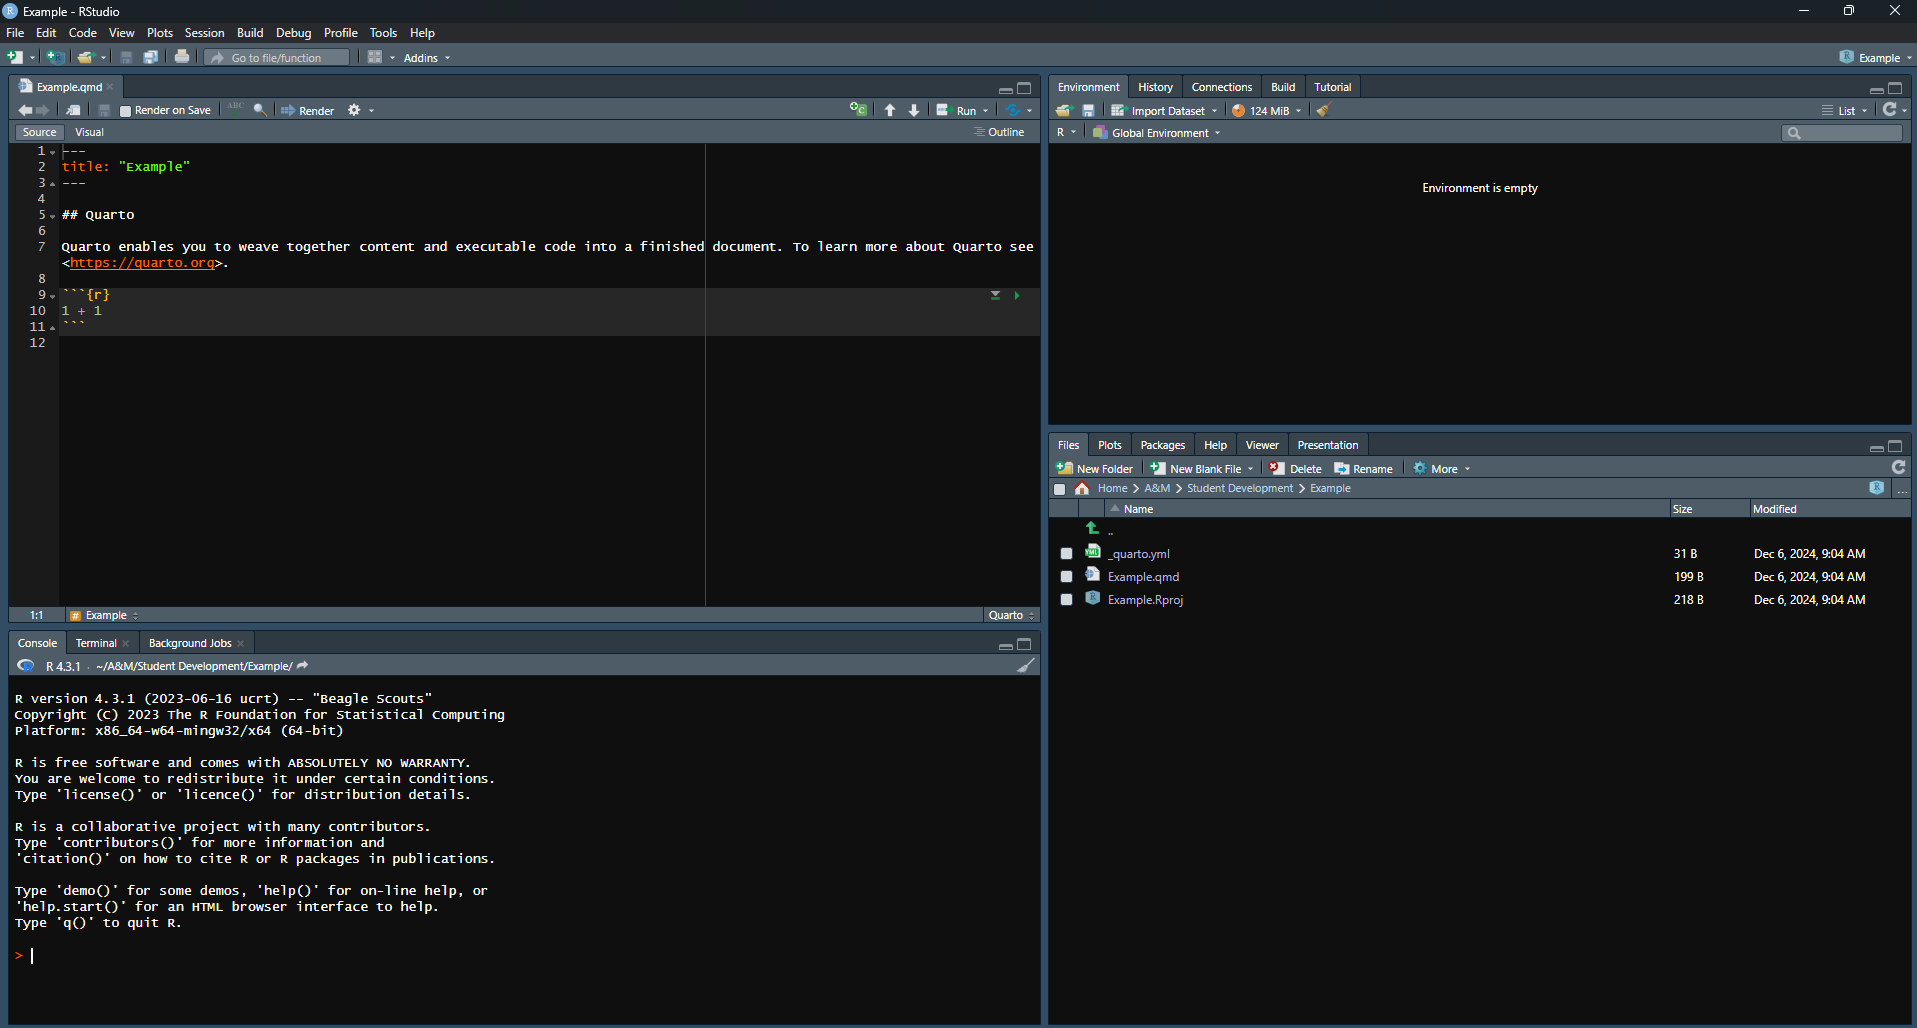
After we click ‘Create Project’, our new Quarto project will open up.
At this point, we are ready to start!


Closeread Authorization
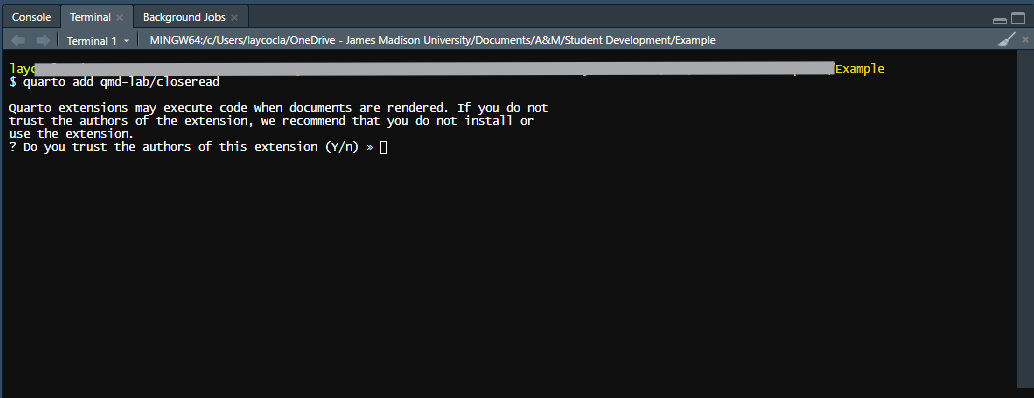
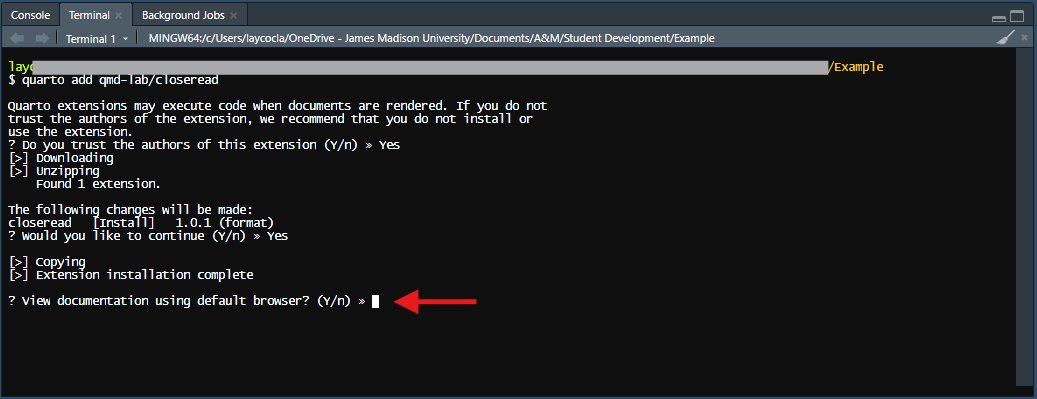
In order to create a scrollytelling document, we need to first state that we are doing a Closeread document. Going to the ‘Terminal’ Tab of our RStudio window (lower left hand quadrant), we will type in “quarto add qmd-lab/closeread” and hit enter.
It will ask us if we trust the authors of the extension. Since we do, we will type “Y” and hit enter again.
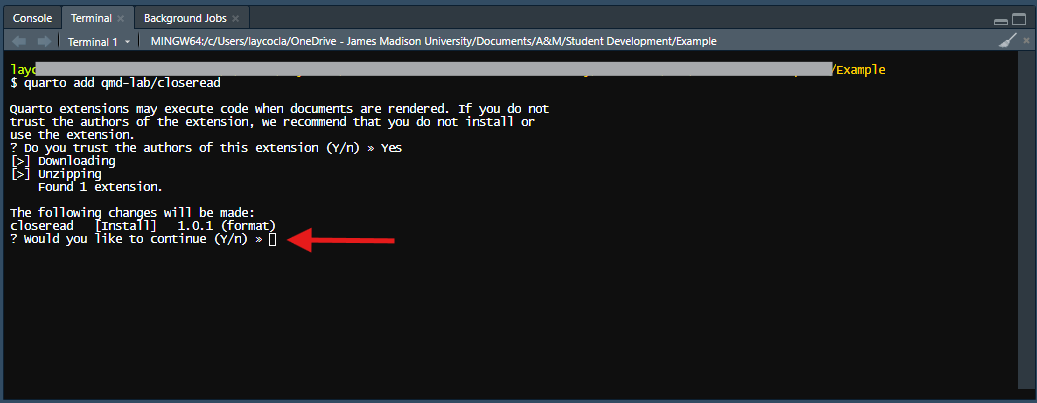
Then, it tells us what modifications will be made, and asks if we wish to proceed. We do, so we will type “Y” again and hit enter.
Once it’s done, it will ask if we want to view the documentation. If you’d like to view the documentation, type “Y” and hit enter, and it will open up in your default browser. If you’re not interested in viewing the documentation at this time, simply type “n” and hit enter, and you can proceed to building your document.

Header
One last task before we can get to making our concept map is to modify the header of our document. If you look at the main window (upper right hand side) that opened up when you started your quarto project, you’ll see a header that looks like this:
---
title: "Example"
---
We need to modify that to again let R know what type of document we are doing. Modify your header to add the lines you see below (and please feel free to change the title!)
---
title: "Example"
format:
  closeread-html:
    cr-style:
      narrative-background-color-overlay: white
      section-background-color: white

---
Other than that header, you can delete everything else that was helpfully auto-populated in you document.
Making the Concept Map
Now! On to our concept map-making.
First, we need to make a concept map to bring in to our scrollytelling document. I find it easier to draw it out on paper first, then transfer it to code, but it can go however your brain works best. I have the code for a sample concept map worked out below - we will go through this and discuss what the different parts are.
Adding the Closeread Component
What we did above was generate the code needed to create the concept map. We could just end there, and provide text below our map to give captioning. That would not be considered a scrollytelling document, but it would get the point across just fine.
Adding Text and Zooming
The last thing we need to add is the text that scrolls by, and some zooming to focus the attention on different portions of the concept map.
Final product
What it might look like with our example concept map if we add some pan and scaling might be this:
Congratualations! You have made a scrollytelling document with a concept map! You can now publish it to share with a wider audience. Check out the links at Quarto to figure out the best method for you - there are many free options available.